

I did something a little steampunky again ^-^ It’s nothing to get too excited about, just a little pouch that I thought would work nicely looped through someone’s belt. Last year I made by boyfriend Batman-themed utility pouches that were a ton of fun to sew, so I wanted to dabble in it again. Since I still had lots of leftover brown and gold fabrics, the combination of this little brown pouch with gold gears seemed like a nice fit! I can totally imagine wearing this on my belt to hold my scissors, pins, and measuring tape >w< It features a flap with turn lock closure, two upper loops for going around your belt, and a small gusset on the bottom to give it a bit of extra depth.

Difficulty:
![]()
It’s a small, straightforward project, but the gusset and turn-lock might give newbies a bit of trouble.
Makes one pouch that is 8” wide, 9” tall, and 2” deep
Materials & Tools:
• 1/3 yd. of medium to heavyweight fabric for main pouch (denim or canvas would be perfect – I used interfaced twill)
• 1/3 yd. of lightweight fabric for lining (I used quilting cotton)
• 1” turn-lock closure
• Two 1/2” metal snaps
• Matching sewing thread
• Basic sewing tools (sewing machine, scissors, iron, needles, pins, fabric marker, seam ripper)
Appliqué supplies
• 8” x 15” scrap of appliqué fabric for gears (cotton, felt, or flannel would work fine)
• 8” x 15” scrap of light or heavyweight fusible web
Before you begin:
1. Print out the project pattern here
2. Assemble the pattern pieces, see the page here for more help
3. Lay out the pattern pieces on your fabric and cut them out
4. Mark the fabric pieces with the markings from the pattern

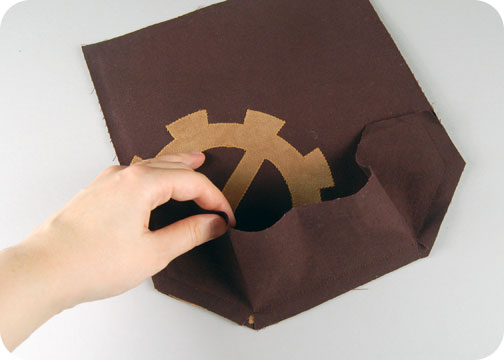
1. First up is appliquéing the gears on the pouch and flap. Of course you could paint your gears on by using the pattern as a freezer paper template, but I decided to sew mine on. I ironed them in place with lightweight fusible web and sewed them with a zigzag stitch around the edges according to the pattern guidelines, but you could also use heavyweight fusible web and skip the sewing altogether. The adhesive in heavyweight fusible web is meant to be enough to hold your pieces in place ^-^ After this, trim off the excess appliqué fabric that’s hanging over the edge. I personally added some fusible fleece interfacing to my fabric pieces here to give the pouch some extra stability, but that’s completely up to you.
2. Next is to sew the gusset along the bottom of the pouch. Line up one long side of the gusset along the bottom of the pouch piece. Start sewing at the circle markings along the gusset pieces to make sewing up the other side much easier. Match up the square markings at the upper corners while at the bottom corners you’ll need to pivot the gusset fabric. With all this in mind, you should be able to fit the gusset piece along the bottom edge of the pouch as the photo shows.

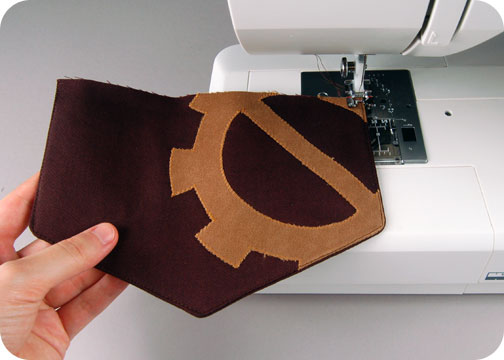
3. When you’ve finished that seam, it looks much better for the finished product to give it some definition. Trim the seam allowances at the corners and turn the fabric right side out. Give the seam a good press, then edge stitch along the seam from the right side so it stands out nicely.

4. Now go back and repeat steps 2 and 3 with the other pouch piece and the remaining side of the pouch gusset. When you finish it should look something like this. The bottom gusset tucks nicely in between the front and back of the pouch, popping out just when it gets full.

5. With the bottom of the pouch all complete, you can move onto the sides. Simply line up the side edges with right sides together and sew up until you get to the corner where the gusset starts, making a neat little Y-seam. At this point you’ll want to go back and repeat steps 2, 4, and 5 for the lining pieces, remembering to leave an opening in the side of the lining during step 5 so you can turn the pouch right side out later.
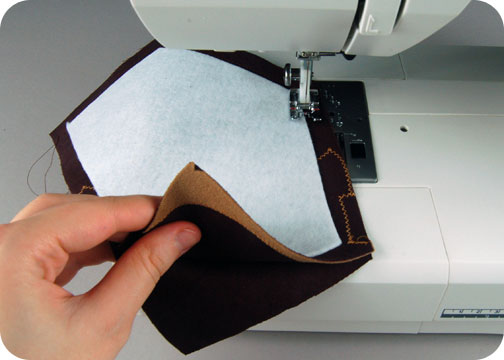
6. Next up is the flap 😀 As you can see, I fused some fleece interfacing to one of my flap pieces, but that’s completely up to you. To get the flap done, simply layer the two pieces together with right sides facing and sew them along the sides and bottom, leaving the top straight edge free for turning the flap right side out. Then, trim the seam allowances, turn the flap right side out, and iron it nice and flat.
7. I did a little edge stitch around the bottom edge of my flap so it stays looking crisp ^-^

8. Next I did the straps, which are very straightforward. Simply fold them in half with right sides together and sew down one edge and along the pointed end. Leave the straight end open for turning the strap right side out. Then you’ll want to trim the seam allowances, turn the strap right side out, and press it flat.

9. Once again, I did a little edge stitch around the turned edge of my strap so it looks pretty 😀

10. With your flap and straps done, you can now baste them to the top edge of your pouch. You’ll want to start with the straps – baste the raw end to the top edge of the pouch back piece where the pattern guidelines indicate.

11. Next baste the flap in place. Layer them over the straps with right sides facing, centering the raw edge along the back top edge of the pouch and baste it in place.

12. With all the extra stuff basted on, you can then sew the top seam of your pouch. Nestle your main pouch into the pouch lining with right sides facing and line up the top raw edge. Then sew all the way around the perimeter so the opening is all joined up like in the photo.

13. Turn your pouch right side out from the opening in the side of your lining and press the top seam nice and flat. To keep it looking crisp and neat, I edge stitched along that top seam. Be sure to open out the straps and flap so they don’t get in the way as you do your topstitching.

14. Your pouch is now pretty much done! All that’s left is to add the hardware. First up is the turn-lock closure. Install the lock part of the turn-lock on the pouch front according to the pattern guidelines, then install the opening on the flap.

15. Lastly you can install the snaps on the strap parts ^-^ To get the right placement, you’ll want to install the socket end on the bottom front of the straps, the prong on the top front, and the cap part of the snap on the top back of the straps. This will ensure that your straps fold over and snap together correctly with the cap facing outward. Now go suit up with your tools because YOU’RE DONE!
I hope you enjoyed what you saw! 😀 At first the idea felt like such a simple project, but I love how the gusset, straps, and hardware take it a little beyond basic and boring ^-^
If you do try making the project, I’d love to see it! And I’ll send you exclusive free patterns as a reward!
For questions and terms of use information, please see the FAQ.
5 thoughts on “Freebie Friday! The Engineer’s Pouch”
I love this idea! I was looking for exactly this sort of thing! My only question is: with the pattern as given, what is the widest belt the straps can accommodate? Thanks 🙂
I’m so glad you like it! I hope making one will help you out with what you need 😀 You should be able to use this with belts as wide as 1 1/2″ or so, but you could also lengthen the strap piece to accommodate larger belts if you needed to ^-^
I made this (wrote wrong name)
https://m.facebook.com/photo.php?fbid=716204178486104&id=100002895867457&set=rpd.100002895867457&source=49
I finish mine today..it was really easy and fast..I had a little problem with the gusset but I figure it out
I’m so glad you enjoyed it!