

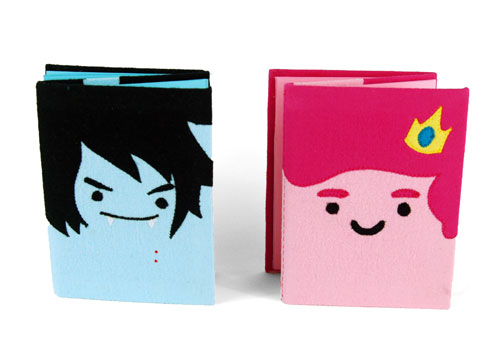

I couldn’t help myself! I made some more of the Adventure Time dos-a-dos bound notebooks 😀 This time we have Marceline/Marshall Lee with Princess Bubblegum/Prince Gumball. They’re made just the same as the previous iteration, but just some different appliqué this time. So you’ll see that the instructions are pretty much the same, but one or two have changed to account for the different characters ^-^

Difficulty:
![]()
There isn’t much sewing to this project besides the appliqué in the beginning, but the assembly of a two-sided book takes a bit of accuracy.
Makes one double-sided notebook that measures 4 1/2” x 5 3/4” and has 40 pages on each side.
Materials & Tools:
• Poster board for book cover
• Two pieces of decorative paper for the inner lining
• Twenty sheets of 8 1/2” x 11” printer paper
• 1/4 yd. of lightweight interfacing
• Fabric glue (and rubber cement – optional)
• Basic sewing tools (sewing machine, scissors, iron, needles, pins, fabric marker, seam ripper)
For Marceline/Marshall Lee notebook
• 8” x 8” piece of light blue and black lightweight fabric for outer cover
• Scrap appliqué fabrics in black, white, red, dark red, and light blue
• 8” x 10” scrap of lightweight or heavyweight fusible web
• Red fabric paint and paintbrush, red fabric marker, or red embroidery thread (see step 10)
For Princess Bubblegum/Prince Gumball notebook
• 8” x 8” piece of light pink and magenta lightweight fabric for outer cover
• Scrap appliqué fabrics in magenta, black, yellow, blue, and light pink
• 8” x 10” scrap of lightweight or heavyweight fusible web
Before you begin:
1. Print out the project pattern here
2. Assemble the pattern pieces, see the page here for more help
3. Lay out the pattern pieces on your fabric and cut them out
4. Mark the fabric pieces with the markings from the pattern
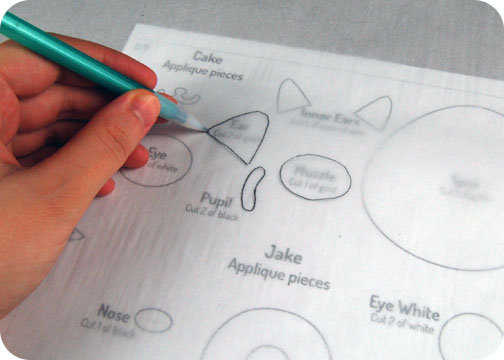
1. The brunt of this project involves the appliqué that goes into making the faces for the characters, so I decided to take this part step by step so there’s no confusion. First you’ll want to take your fusible web and layer it over your appliqué pattern pieces with the glue side facing down, then trace over the shapes you need for the character you’re making. Use lightweight interfacing if you want to sew your fabric pieces in place, or stick with heavy duty interfacing if you want to make life easier on yourself and skip the sewing. You’ll want to group together like colors while tracing to make the next step easier.
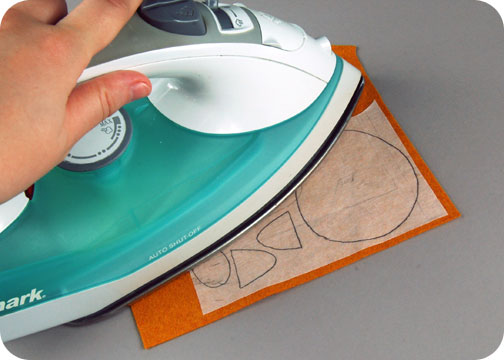
2. Cut generally around the shapes for each color. Layer the fusible web with the glue side down over the wrong side of your appliqué fabric and iron the fusible web in place.
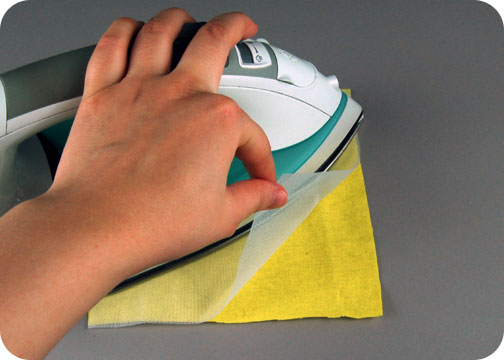
3. To make assembling the book a little easier on yourself, we’re applying some interfacing to the cover fabric. Simply iron each interfacing piece on the wrong side of your fabric pieces for the book cover.
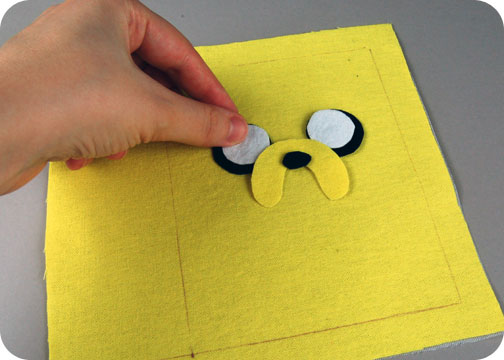
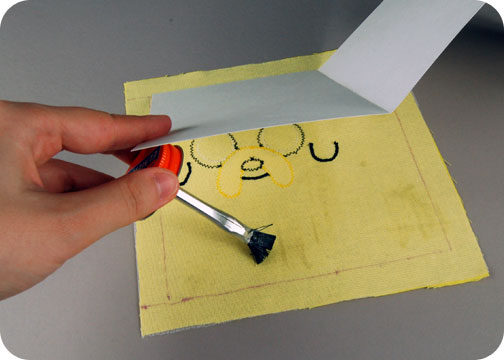
4. Now the fun part :B At least it is for me. Cut out your appliqué pieces, remove the paper backing, and start assembling them on your book cover fabric. Use the guidelines found in the pattern to get the proper placement and layering. When you have it just like you want it, iron all the pieces in place.
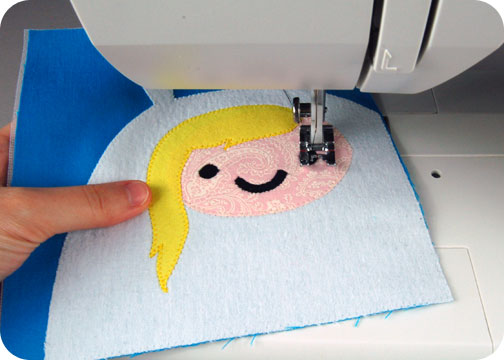
5. Now, if you used lightweight fusible web, this is where you’ll want to sew the edges of your fabric pieces. I personally sewed a zigzag stitch around the outside of each fabric piece. You could also do a straight stitch. BUT, if you used heavy duty fusible web, you can skip sewing it altogether 😀 The heavy duty stuff doesn’t need any sewing and is meant to keep your pieces secure with just the adhesive alone.
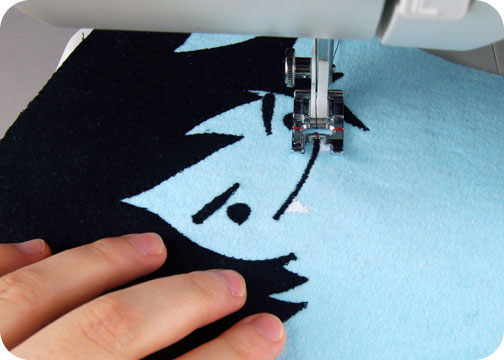
6. Marshall Lee’s face poses one exception, the line needed for his mouth is too small to do with fabric pieces. Draw in the lines for these parts as they’re indicated on the pattern guidelines. In this case I sewed mine on with a satin stitch, but you could also sew it with a straight stitch on your machine, draw it on with a fabric marker, or paint on the lines with fabric paint – no need to get too fussy 🙂 It’s just one line after all, but it’ll pull together the whole look of his face.
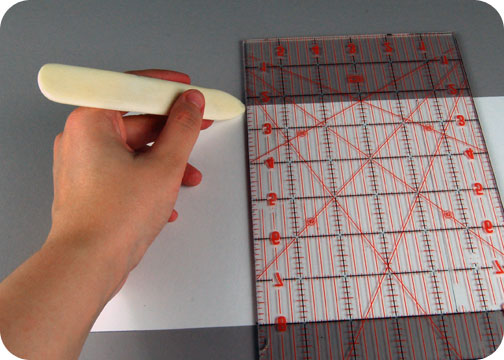
7. Now, onto the body of the book! First we’re making the folds that create the distinct shape of the dos-a-dos binding. From your poster board, create a valley fold and mountain fold along the fold lines indicated in the pattern. I made mine with a bone folder which is a great tool for the job, but any other blunt kind of tool would work well too. When you finish, your book cover should fold up like an accordion (an accordion with just two folds, but an accordion nonetheless).
8. With your book cover in the right shape, you can apply your fabric covering. I use rubber cement here because I like the kind of semi-permanent hold it gives for this part of the project. You can use craft glue as well (but you’ll probably want to wait until the glue fully dries before moving along to the next step). Either way, coat the fabric within the fabric margins as indicated by the pattern. Then lay the poster board over the wrong side of the fabric so that it lies within the margins and the mountain fold faces the wrong side of the fabric (it should match up with the line marked on the fabric pattern as well). This will ensure that the front of your book is facing the right way.
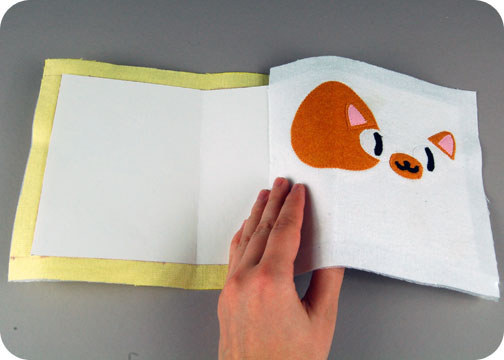
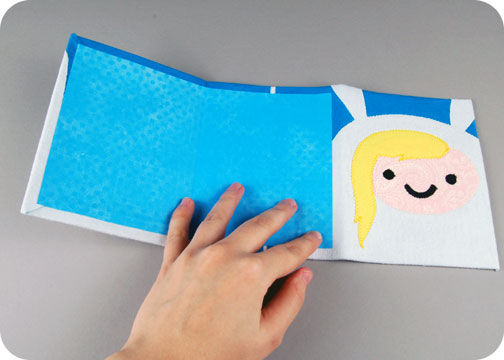
9. Repeat this with the other side of the poster board and your remaining book cover piece. When you finish it should look something like this, so note that you should end up with fabric on opposite sides of the poster board 😀 It might look wrong, but it’s totally right!
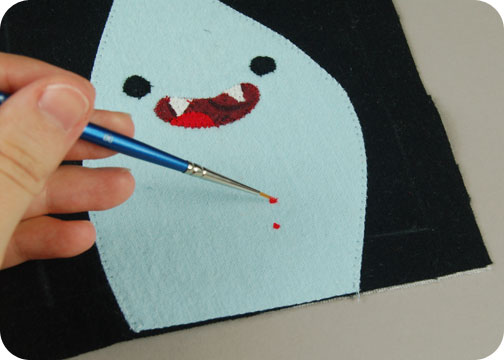
10. Marshall Lee & Marceline also need one more detail to make them complete, and that’s their bite marks. Again, the spots were just too tiny to do in fabric, so I opted to do mine in fabric paint, but a red fabric marker would also do the trick. I bet little French knots done in red embroidery thread would look awesome as well! Either way, make sure your pigment is fully dry before moving onto the next step.

11. To clean up your edges, trim off the corners of your fabric margins and fold them over towards the poster board. Here’s where I used more rubber cement, as a super strong bond here isn’t really necessary, so a light coating of craft glue would also work. I find that using a rubber mallet or a similar whacking tool to smash the edges makes them look very clean and sharp – really nice for good-looking corners!
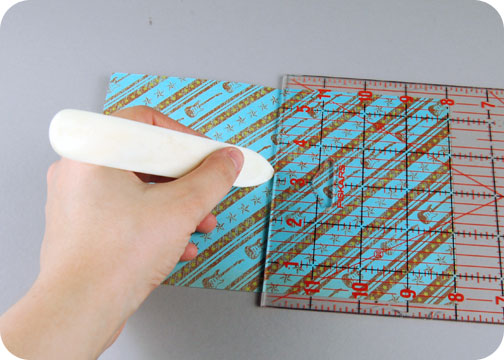
12. To cover up the raw edges of fabric on the inside of your book, we’re adding in a paper lining. This is where you’ll want to break out and fancy paper you might have, such as scrapbook paper or cardstock. Cut it according to the pattern guideline, then score a valley fold down the middle from the right side of the paper.
13. When your inner lining is nicely folded, you can then use it to cover up the blank area left in step 10. Center it over the fabric margins and glue it in place with some craft glue. You’ll want to avoid the rubber cement for this part, as the hold it provides won’t be quite strong enough for what you need.
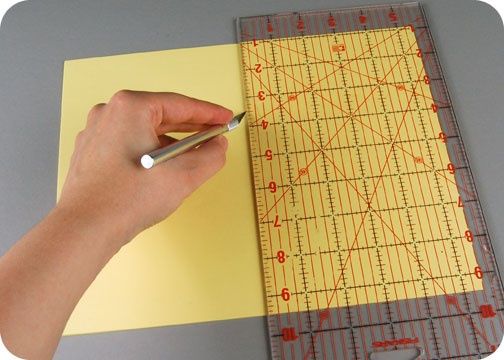
14. Now to prepare your inner papers! With your 8 1/2” x 11” papers, cut them in half widthwise. You can use your scissors for this, but an Xacto knife is much more precise. You should be left with rectangles that are 8 1/2” x 5 1/2”
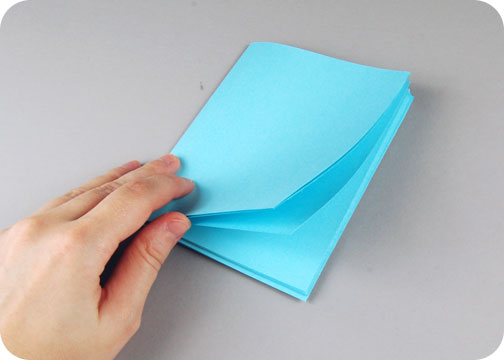
15. To fit them into your book, fold each set of 20 papers in half widthwise to create one fat section of papers. I used a bone folder to crease a section of five papers or so at a time, then each creased section is slipped inside the previous one to create the book pages. When you finish you should have a set of 2 book paper stacks with 40 pages each.
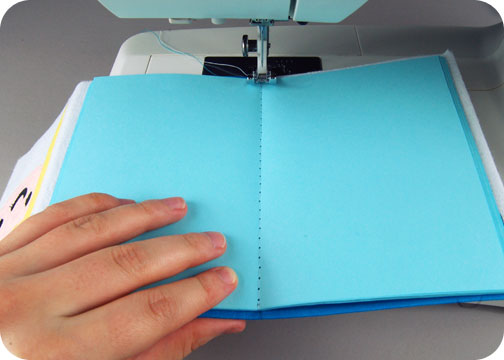
16. Now open up your book pages and make sure the middle crease of all the papers are lined up nicely. Center that crease on the valley fold over your decorative paper book lining. Using your longest stitch length (any shorter and your paper will be perforated), sew down this crease to attach your book pages to your book cover. Go slowly with your machine, as you’re sewing through a lot of layers. Now repeat this with the other side of your dos-a-dos and your second chunk of book papers. Your book is almost done!
17. Everything is in place for your new book, but you might notice that it doesn’t want to sit flat like a typical book. That’s an easy fix 😀 Simply press your book beneath some heavy objects (books and lifting weights are perfect), and let it sit for a good while (overnight is ideal). When you take it out from beneath the weights you should have a nice flat book to play with! All that’s left is to decide what you’ll fill in on each side!
I think I have two more character ideas I want to try, and then I’ll consider my notebook set complete! >w< Stop by again soon for the last pair!
If you do try making the project, I’d love to see it! And I’ll send you exclusive free patterns as a reward!
For questions and terms of use information, please see the FAQ.