

All right! Time for some more old school video game love >w< For a while I’ve been wanting to make a plush version of the famous Tetris blocks, but the idea of just having plush squares seemed like it could be livened up at least a bit. When I remembered that I was in desperate need for some more pincushions, I put two and two together to make these 😀
These helped me use up some long-stashed quilting cottons so it allowed me to make the Tetris blocks into some wild colors as opposed to the traditional primaries. I kinda prefer it this way ¬3¬ Of course, you don’t need to make yours pincushions – you could increase the pattern and make them traditional plush size, or even pillow size! I think that would be a lot of fun 😀 I personally can’t get my boyfriend to stop playing with them XD

Difficulty:
![]()
These are made with only straight lines, but there’s a bit of hand sewing and also working with sharp corners which might not be great for newbies.
Makes one pincushion that’s 4” wide, 4” tall, and 2” deep (depending on which block configuration you make)
Materials & Tools:
• ¼ yd. of lightweight fabric (broadcloth or linen would work – I used quilting cotton)
• Batting
• Matching sewing thread
• Basic sewing tools (sewing machine, scissors, iron, needles, pins, fabric marker, seam ripper)
Before you begin:
1. Print out the project pattern here (just print page 1, page 2 is a chart for reference)
2. Lay out the pattern pieces on your fabric and cut them out
3. Mark the fabric pieces with the markings from the pattern

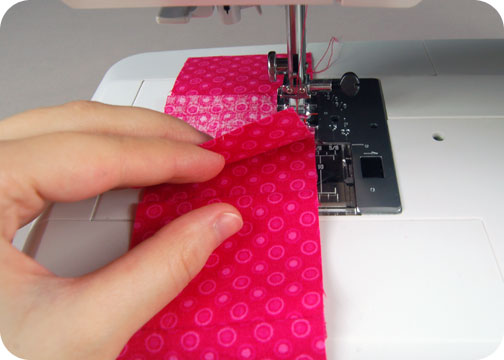
1. Before we begin, you should know that the least headache inducing way of sewing a cube is to sew only to each corner of the cube, and don’t sew over the seam allowances. The pattern guideline has circles at each corner of the squares that form the cubes. For each sewing step, only sew from circle to circle for the best results. Hopefully you’ll see how it helps as you progress through the steps. So! To begin, you’ll want to make a chain from 4 of your squares, sewing one side to another until you have a line of 4 squares. As I said, sew them together along the edge from circle to circle and no further.
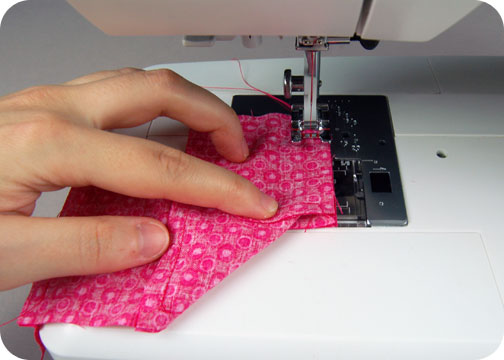
2. Our goal from here is to make a lower-case t shape with the squares. Sew another square to the side of the second square down. Again, starting and stopping at the circle marks. With any luck you should start and stop where the seams are from your previous step.

3. Repeat step 2 with the other side of the same square and another new square. This should complete the t shape that we’re going for as illustrated in the pattern guideline.
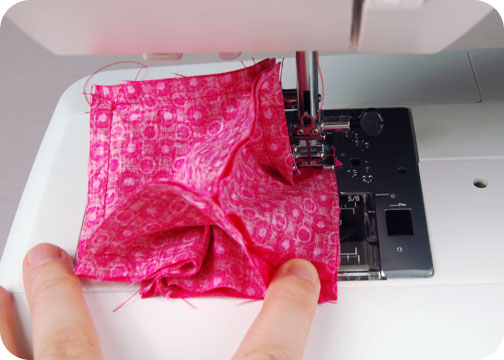
4. To start forming the cube, we’re going to fold up the squares surrounding the middle square to create the sides of the cube. It should look like this under the machine, and you’ll see what it looks like when you finish next:

5. This is what it should look like when all the sides are folded up. As you can see, the two edges that meet up should be sewn together all the way around the cube. That just leaves the top to be sewn!
6. Fold the top flap down and match up all the raw edges. We’ll be sewing around this edge, pivoting at the corners where the seams are. Be sure that when you sew along one of the 3 sides, you leave about a 1½” opening so you can turn the cube right side out later.

7. Once the cube is all sewn up, you’ll want to clip the excess seam allowance at each corner and turn the whole thing right side out. Poke the corners with a chopstick or something similar to get the corners looking crisp. Then stuff the little cube with batting – once again, really focusing on getting the corners stuffed nice and firm.

8. Now you can tuck under the seam allowances in the opening you left. From that opening, hand sew it closed with a ladder stitch.
That completes 1 cube! Now you just need to go back and repeat steps 1-8 three more times to create 4 completed cubes.
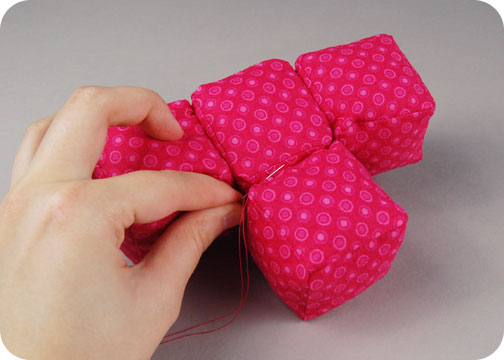
9. To finish your Tetris block, it’s just a matter of arranging your cubes in the desired shape, then sewing them together along the edges with a ladder stitch. The illustrations in the pattern will help you make sure your placement is right and remind you where to stitch. And that completes your block!
It feels good to make some more old school video game projects ^-^ And beyond that, now I have some new pincushions!
So what do you think? Do you have any retro video games that you love to death? Let me know in the comments!
And if you do try making the project, I’d love to see it! And I’ll send you exclusive free patterns as a reward!
For questions and terms of use information, please see the FAQ.