

Even though I’ve already done a Gothic Lolita inspired bag earlier, I’ve got to say there are dozens more Lolita styles I’d like to try before saying I’ve touched on them all >w< so here’s another one! Rather than a large satchel like the previous project, this one is more of a dainty-style purse with almost a tube-like shape. And of course it has some nice lace detail and a Lolita style painted motifs.
The fabric is the absolute last from a skirt I made way back at the beginning of college XD So once again I’ve finally used up fabric that I had been carrying around for years; I couldn’t be happier :B!

Difficulty:
![]()
This purse has a few details such as the lace trim and curved sides, but that’s about as hard as it gets.
Makes one purse that is 11” wide, 6” tall, and 3” deep
Materials & Tools:
• ¼ yd. of medium to heavyweight fabric for main purse (canvas or denim would be perfect – I used interfaced faux suede)
• ¼ yd. of medium to heavyweight fabric for contrast strap & sides (canvas or denim would be perfect – I used twill)
• ½ yd. of lightweight fabric for lining (I used quilting cotton)
• One ⅝” snap
• 1 yd of 1” wide lace
• Matching sewing thread
• Basic sewing tools (sewing machine, scissors, iron, needles, pins, fabric marker, seam ripper)
• Fabric paint, freezer paper, and other fabric stencil supplies OR
Appliqué supplies
• 5” x 8” scrap of appliqué fabric
• 5” x 8” scrap of light or heavy duty fusible web
Before you begin:
1. Print out the project pattern here
2. Assemble the pattern pieces, see the page here for more help
3. Lay out the pattern pieces on your fabric and cut them out
4. Mark the fabric pieces with the markings from the pattern
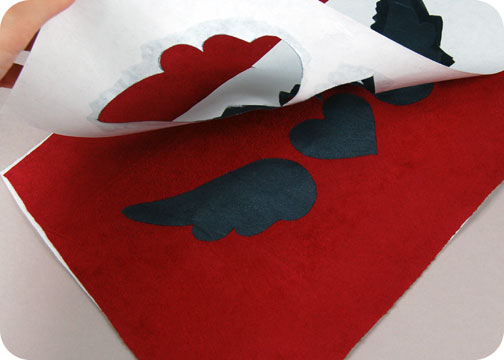
1. To get the complete Lolita look I painted on some wing and heart motifs using the patterns as fabric paint templates ^-^ You can find out how to make your own from my tutorial. Or you could apply your motifs with fabric appliqué and some heavy or light fusible web and appliqué fabric.
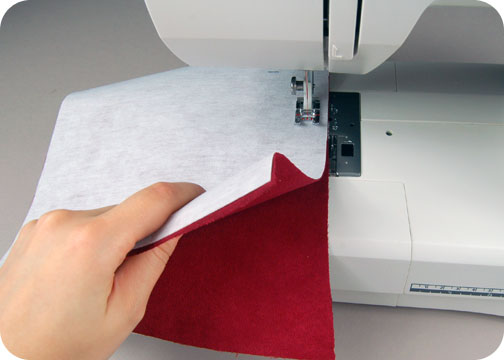
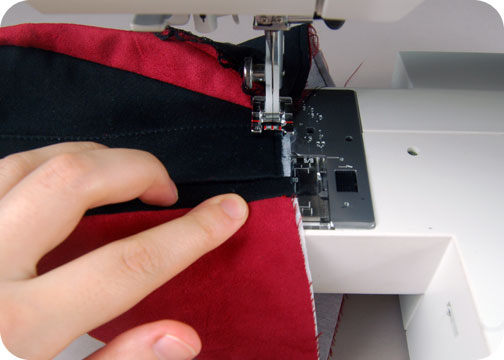
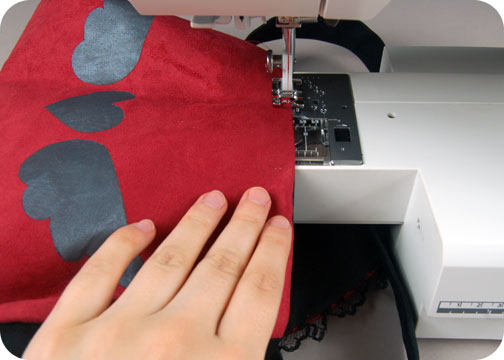
2. For the front and back of the purse, all you need to do is sew the front and back pieces together along the bottom edge. Simply line up the raw edges and sew them together. Press the seam open when you finish.
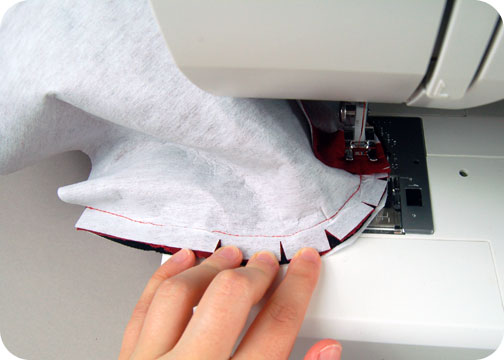
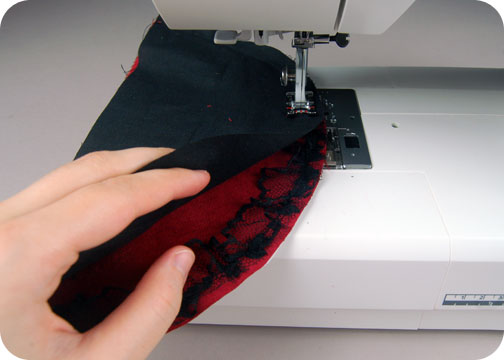
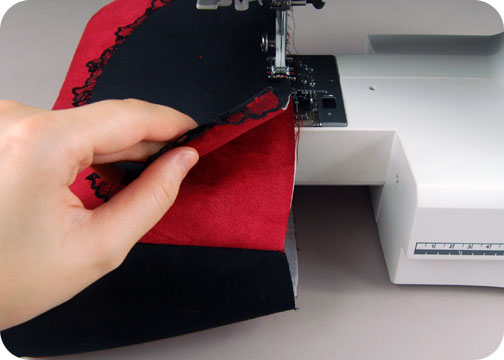
3. To apply the sides is a little trickier. After you’ve sewn the purse front and back, take the side edges of that full piece and clip about ½” in so it can bend around curves more easily. You’ll want to match up that edge along the curved edge of your side pieces, going all the way around the curved edge (leaving the top edge free). You’ll see that your seam from the previous step should match up with the single notch on your side pieces. Once all the edges are matched up, you can sew them together. Once that is all finished, you can repeat the same thing with the other side piece.
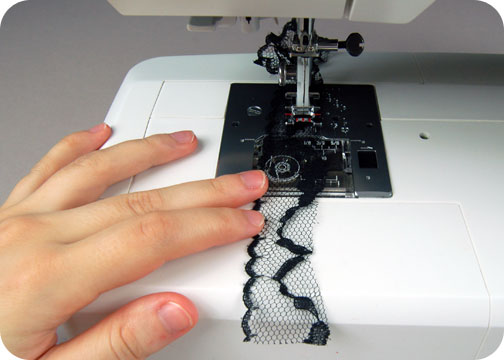
4. The body of your purse is pretty much done at this point, but next we need to work on the extra stuff like the flap and strap. To start the flap, take your length of ribbon and run a gathering stitch (about 7 stitches/inch) down the length of it. When you finish that, use that thread to gather the lace down to about 15” long.
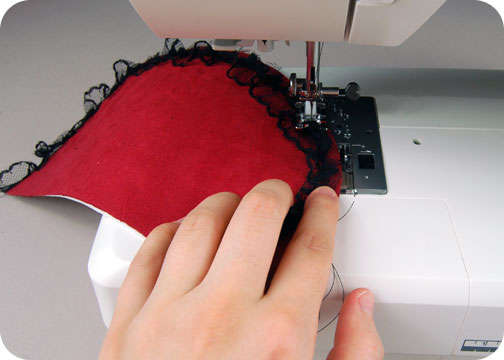
5. With your lace all scrunched up, baste it to the curved edge of your purse flap, lining it up with the raw edge. This will hold it in place while you finish the flap so just a little bit of lace peeks out ^-^
6. To finish your flap, take the flap’s corresponding lining piece and line it up on top of your main flap piece with right sides facing. Sew them together along the curved edge, leaving the top straight edge free for turning it right side out. Trim your seam allowances, then turn the flap right side out and press it nice and crisp. Your lace should be peeking out of the edge to make a pretty looking trim.
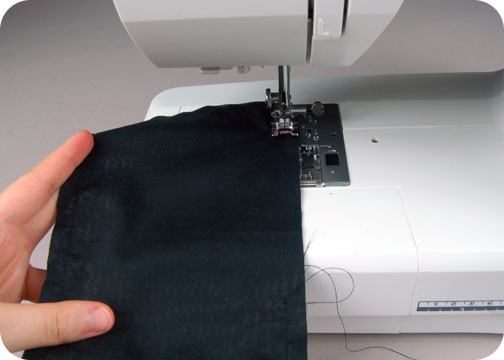
7. With your flap all finished, you’ll want to baste it to the back of your purse. With right sides together, line up the straight edge of the flap with the top edge of your purse (the side without the appliqué/paint). Then baste it in place within the seam allowance to make step 13 much easier.
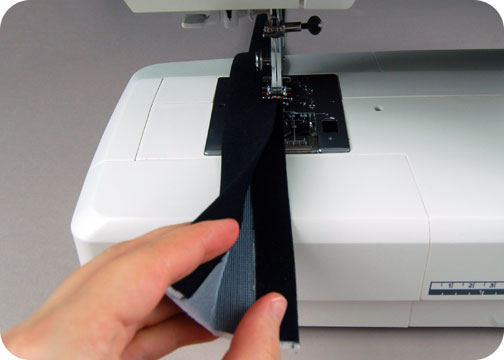
8. With the flap all done, next is the strap. Simply take your strap piece and fold under each edge by ⅝”. Then fold the whole strap in half lengthwise with wrong sides together. Edge stitch the folded edges in place and you have a finished strap with neat edges on each side.
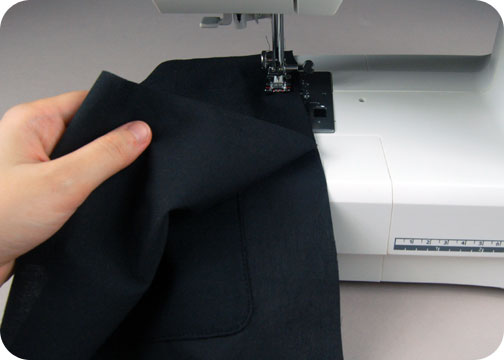
9. Now you can baste the strap in place just like you did with the flap. Simply take one end of the strap and line up the raw edge against the top edge of one of your purse sides. Baste it in place within the seam allowance. Then take the other end of your strap and repeat the same thing with the other purse side. Be sure that your strap doesn’t get twisted along the way.
10. Next we move onto the lining. For my purse I added a little inner pocket for extra stuff. So to make that, start by taking your two pocket pieces and lining up all the wrong edges with right sides facing. Sew around the perimeter, being sure to skip over the opening in the bottom that we’ll use for turning the pocket right side out. Trim your seam allowances, turn the pocket right side out, tuck under the seam allowances from the opening, then press the whole pocket flat and crisp.

11. Pin your pocket to one of your lining pieces following the pattern guidelines, then edge stitch it in place along the sides and bottom. This should close up the opening in your pocket from the previous step while also affixing your pocket in place.
12. Next you can assemble your lining pieces much the same way as your main purse pieces. Layer your two lining pieces together and sew along the bottom edge as in step 2. Be sure to leave an opening in the bottom for turning your purse right side out later. Press the seam open when you finish. Then go back and repeat step 3 with your side lining pieces to complete the lining.
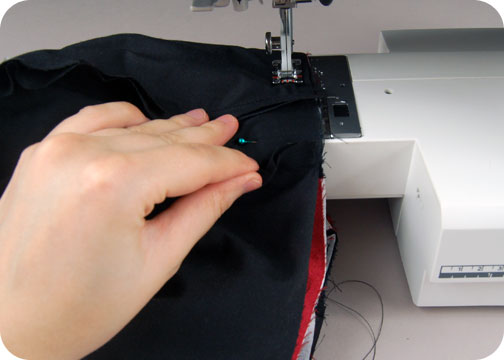
13. With your main purse and lining complete, you can now attach the two along the top edge. Nestle your main bag into your lining and line up the top edge. Make sure your flap and strap are tucked neatly inside the purse so they don’t get in the way while you sew. Then sew all the way around the perimeter of this edge. When you finish, turn the purse right side out from the opening in the lining, and tuck the lining back inside the bag. Press the top edge firmly so it’s nice and crisp.
14. To keep the top edge looking crisp, you’ll want to edge stitch around the top edge of the bag to keep the lining from peeking out as well. Once again you’ll want to move the strap and flap out of your way so you don’t accidentally sew over them.
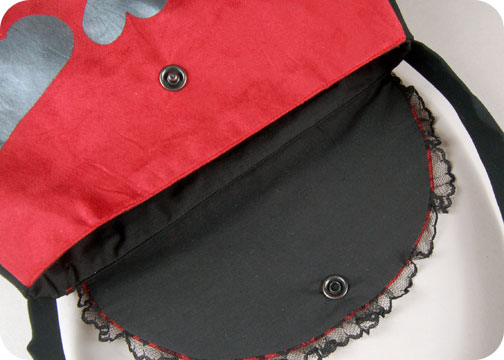
15. All that’s left is to attach the snap to your flap! Following the pattern guidelines, install the cap half of your snap to the flap, and the remaining parts to the main part of your purse. Now pair it with your favorite cute outfit because YOU’RE DONE!
I sure hope you’re not getting tired of seeing these Lolita inspired projects >w< because I’m probably going to keep coming up with more.
I hope you enjoy making this project, but if you’d rather have the one from the photos, you can purchase it from my Etsy.
And if you do try making the project, I’d love to see it! And I’ll send you exclusive free patterns as a reward!
For questions and terms of use information, please see the FAQ.