
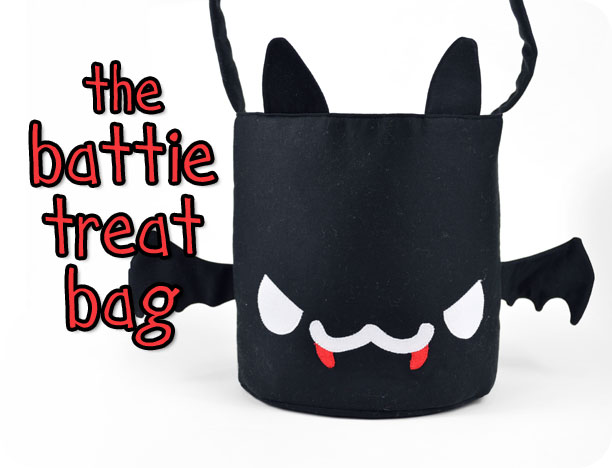
Another Halloween treat for you all! This time it’s directed mostly at the kiddies ^-^ I had some scraps of black twill that I thought would work perfectly for a little treat bag. Lots of different animal options came to mind, but a cute little bat enamored me the most. Now your favorite vampire or witch will be completely set for Halloween!
The bag is just a simple bucket bag style, but the added wings, ears, and appliqué make it perfect for any little vampires or witches out there. Or you could leave off the handle and use it for handing out candy this year 😀

Difficulty:
![]()
Pretty simple to tackle, though there’s some appliqué and curved sewing to get through.
Makes one bag that’s 8” wide, 8” tall, and 5” deep.
Materials & Tools:
• 1/3 yd. of 60” wide or 1/2 yd. of 45” wide medium to heavyweight fabric (denim or canvas would be great, I used interfaced twill)
• 1/3 yd. of lining fabric (thin cotton would be perfect, I used polyester lining fabric)
• Matching sewing thread
• Basic sewing tools (sewing machine, scissors, iron, needles, pins, fabric marker, seam ripper)
Appliqué supplies:
• 5” x 5” scrap of white appliqué fabric
• 3” x 3” scrap of red appliqué fabric
• 5” x 5” scrap of light or heavyweight fusible web
Before you begin:
1. Print out the project pattern here
2. Assemble the pattern pieces, see the page here for more help
3. Lay out the pattern pieces on your fabric and cut them out
4. Mark the fabric pieces with the markings from the pattern
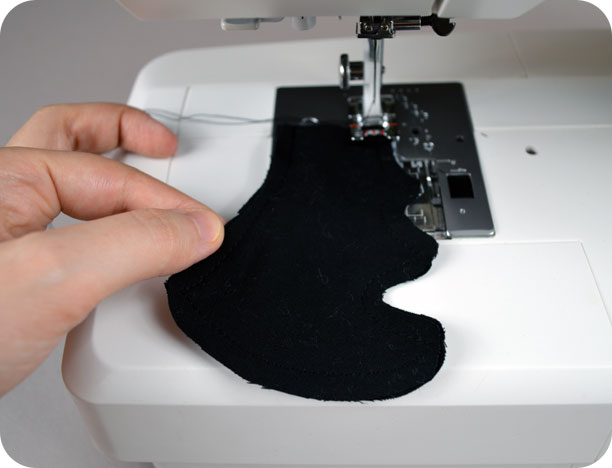
1. First we’re making all the little battie extremities – here we have the wings. Simply take two of the wing pieces and layer them with right sides together, then sew them together around the curved edge. Leave the straight edge free for turning the wing right side out. Clip your seam allowances (especially around the curves), turn the wing right side out, and press it flat. Repeat this with the other two wing pieces to create wings for both sides of the bag.
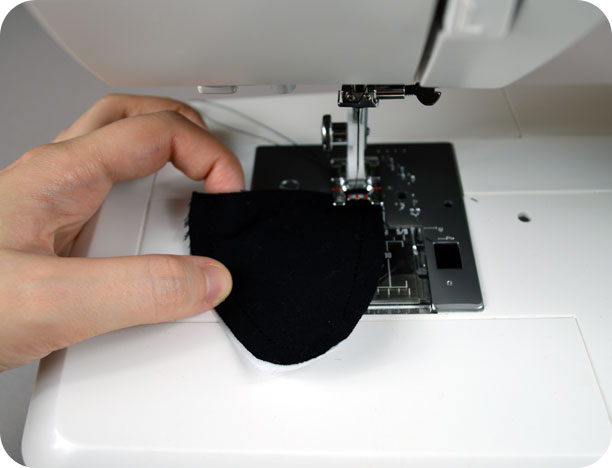
2. Next up is the ears, which are done in much the same way. Layer two of the pieces together with right sides facing, then sew around the curved edge leaving the straight edge free. Trim the seam allowances, turn the ear right side out, then press it flat. Repeat with the last two ear pieces to complete two ears for your battie friend.
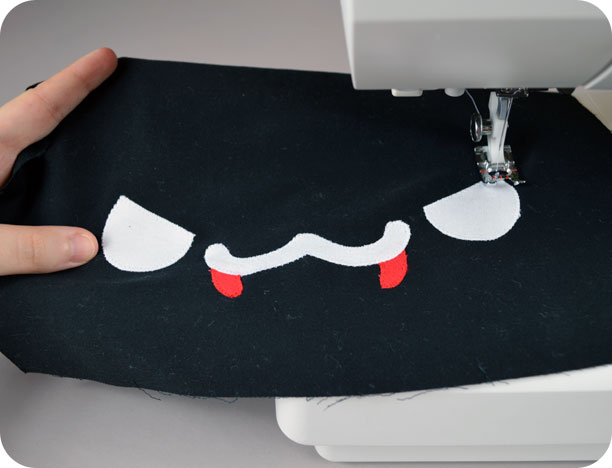
3. Now onto the appliqué! For the bat’s face, I personally traced my appliqué pieces to lightweight fusible web, then ironed it to some cotton appliqué fabric. All that’s left to do is cut out the pieces, iron them to your bag front (where the pattern indicates), and sew them in place. I used a zigzag stitch personally, but you could also use a straight stitch or satin stitch. Or, if you use heavyweight fusible web, you can skip the sewing altogether. That’s especially nice if you need to make the bag in a hurry or for lots of lucky kiddies!
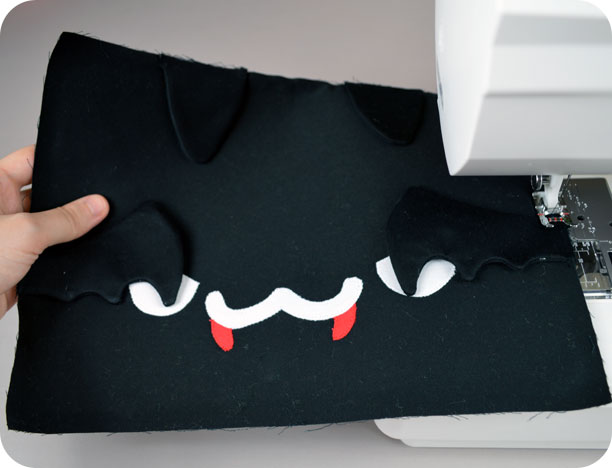
4. When the face is all done, you can then add on your finished ears and wings. Baste the wings in place along the sides of the bag front where the pattern guidelines show, and baste the ears along the top edge. Note of course that the ears and wings are pointed towards the inside of the bag so when the bag is flipped later they’ll be pointing outward.
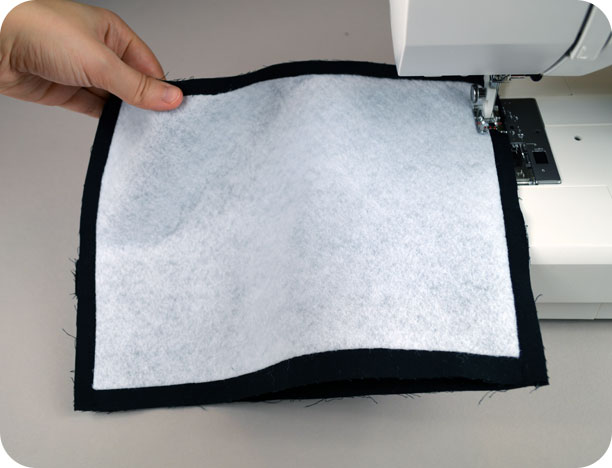
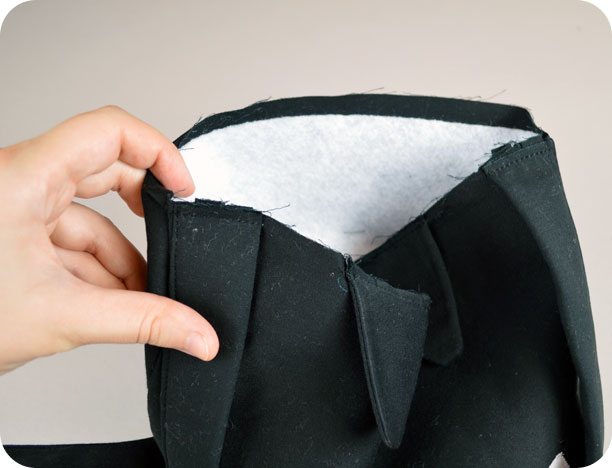
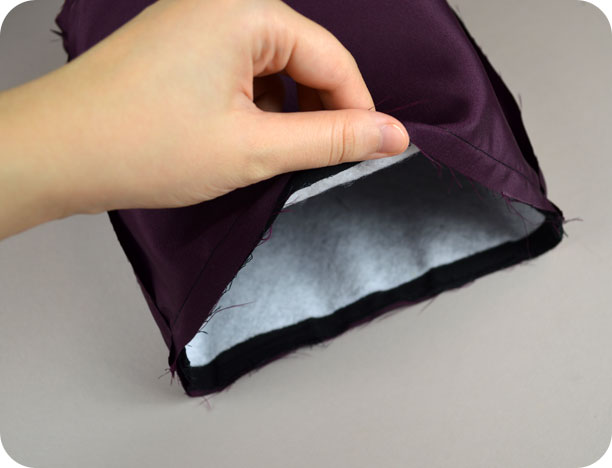
5. With all your bag details done, you can then sew the front and back of your bag together. Simply layer the outer pieces together with right sides facing and sew along the sides. As you can see here, I wanted some more stability for my bag, so I added a layer of fusible fleece interfacing with the seam allowances cut off. Repeat this step with your lining pieces as well, but be sure to leave an opening in the side (as the pattern indicates) for turning the bag right side out later.
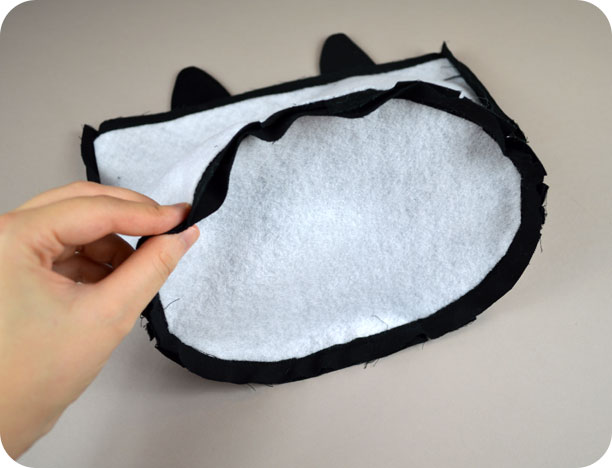
6. Now for the bottom of the bag. This part’s a little tricky since it involves sewing around curves. You’ll want to clip the seam allowances along the bottom edge of your bag front and back, then sew the edge around the perimeter of the bag bottom. You’ll find the side seams should match up with the square markings found on the bag bottom pattern piece. Utilize the clips in the seam allowance to help get a smooth curve around the edge. Your finished seam should look like this. Go back and repeat this same step with your lining pieces as well.
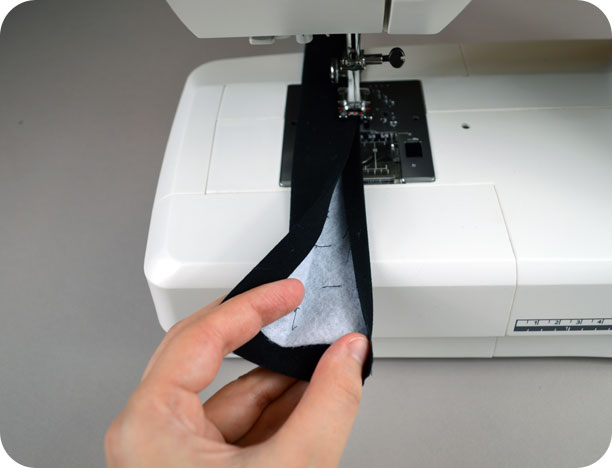
7. Up next is the strap. To make it, simply fold under each long edge of the strap piece by 1/2” and iron it in place, then fold the entire strap in half lengthwise with wrong sides facing. Take this to your machine and edge stitch those folds together to create one long strip with finished edges along the side.
8. You’re nearly done! With your strap ready, now you can baste it to your bag. Take the raw edges of your strap and center them over the side seams of your bag (be sure the strap isn’t twisted when you do so). Baste them in place to prepare for the next step.
9. Now you can finally attach your lining and main bag! Nestle the outer bag into the lining with right sides together and match up the raw upper edge. Also make sure that all of your battie extremities – the wings, ears, and strap – are also neatly inside the bag. Then you can sew around the perimeter of that top edge. When you finish, turn the bag right side out through the opening in the lining, and press that top seam nice and crisp.
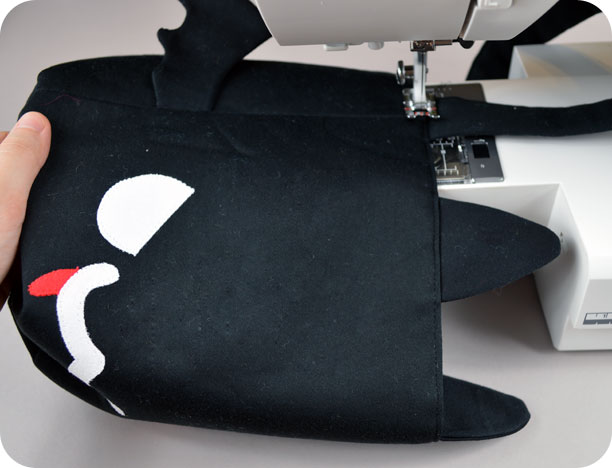
10. To keep the top edge looking crisp, I did an extra edge stitch around the top of the bag. Be sure that the ears and strap are pointing up now, and you should have no problem sewing around the bag. You’ll also want to go back and sew the opening in the lining closed. Now saddle up for some trick or treating because YOU’RE DONE!
I’m glad I got to do more animal/kawaii themed stuff ^-^ Halloween just seems like the perfect outlet for it.
I hope you’ll give this project a try, but if you’d just like to buy the one in the photos, you can find it on my Etsy.
If you do try making the project, I’d love to see it! And I’ll send you exclusive free patterns as a reward!
For questions and terms of use information, please see the FAQ.