

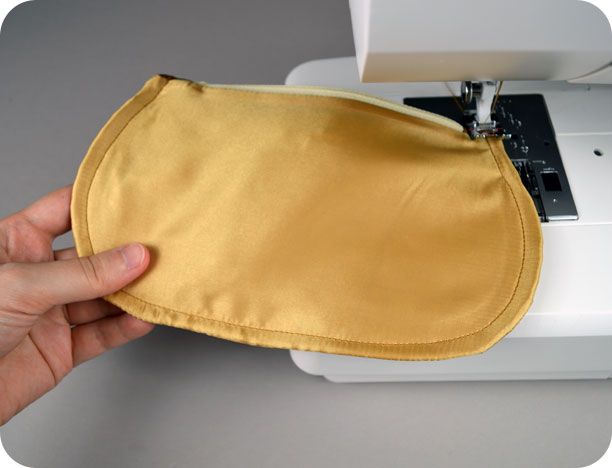
Hi everyone! I’m back to stop in for another quick tutorial during my semi-hiatus :B This time around I made some simple pouches from my stash of satin fabrics. Finding projects to make from such tiny bits of flimsy fabrics like lining and satin is always tough, so when I find a good purpose I really milk it as you can see from all the variations I made here XD Even though satin fabric is really flimsy, I just love all the neat things you can do to manipulate it, and for the most part it really goes along for the ride. You can gather it, pleat it, scrunch it, fold it, drape it, whatever – and it all seems to look purposeful. I played with that a little here by making this small clutch pouch with pleats in it. It seems like the perfect thing to whip up to take along with you to a wedding or something, and you can make it perfectly match your dress ^-^

Difficulty:
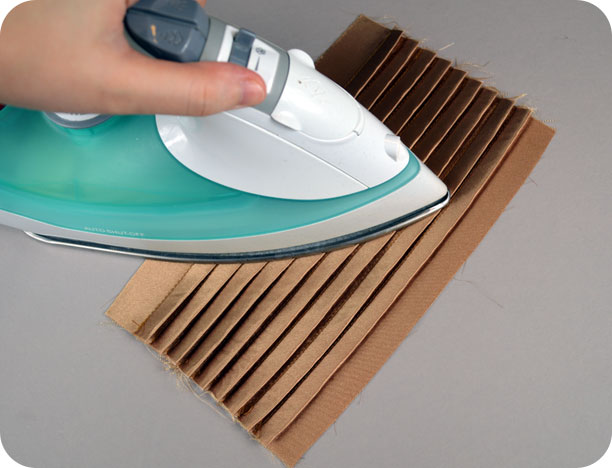
![]()
The concepts are pretty basic, but the pleats and French seam require some precision.
Makes one 8” x 5” pouch
Materials & Tools:
• 1/2 yd. of light to medium weight fabric for clutch (light cotton would be great for a beginner – I used interfaced satin)
• 1/4 yd. of interfacing (optional – if you’re using flimsy satin it’s a big helper)
• 1/4 yd. of lightweight fabric for lining (light cotton would be perfect – I used polyester lining fabric)
• 8” (at least) zipper
• Matching sewing thread
• Basic sewing tools (sewing machine, scissors, iron, needles, pins, fabric marker, seam ripper)
Before you begin:
1. Print out the project pattern here
2. Assemble the pattern pieces, see the page here for more help
3. Lay out the pattern pieces on your fabric and cut them out
4. Mark the fabric pieces with the markings from the pattern

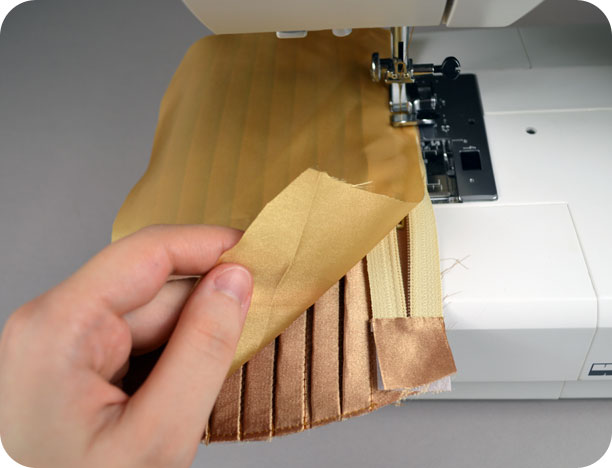
1. First up we need to sew all the pleats in the clutch. This part takes a while, but you’ll find you start to get into a groove 😀 If you’re using flimsy satin like me, it’ll help to apply some light to medium weight fusible interfacing to the back of the fabric before you begin (I also applied it to the Outer Clutch – Back, zipper tabs, and strap).To create one pleat, fold the fabric along one of the fold lines and match up two of the stitching lines. Sew along that stitching line and that creates one pleat. Keep repeating this with all of the fold lines and stitching lines a total of 8 times until you’ve worked your way across the entire rectangle of fabric.
2. When you finish, take the fabric to a nice steamy iron and press all the pleats in one direction.

3. Using the Outer Clutch – Back pattern, trace the pattern shape onto the pleated fabric. You’ll want to place the pattern so the bottom of the clutch is where pleats are pointing downward. If done correctly, the rectangle of pleated fabric should be a little bigger than the outer clutch pattern, so you have some wiggle room to work.

4. Baste the pleats in place by sewing just inside the line you’ve traced. When you finish, trim the fabric along the traced line to create the front of your clutch!

5. Trim your zipper to 6 1/2” long, then sew the zipper tabs on the ends: sandwich the cut ends of the zipper between two of the zipper tab pieces and sew through all the layers. This will make the zipper much easier to install into the clutch later.
6. To install the zipper, layer the zipper between the outer clutch fabric and one of the lining pieces with right sides facing. Sew all three layers together with a 1/4” seam allowance. When you finish, press the fabric away from the zipper, then repeat the same step with the other side of the zipper and the remaining pouch pieces.
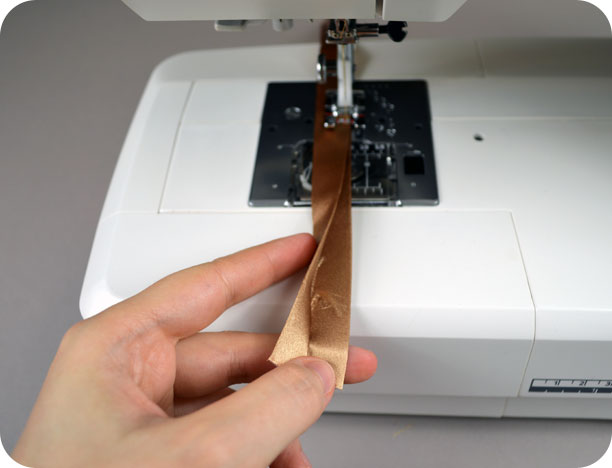
7. To make the strap, fold the entire fabric piece in half lengthwise with wrong sides facing. Iron it in place to make a nice crease. Then, open out your strap and fold the raw edges inward toward the crease you’ve created. Iron those folds in place, then fold the entire strap in half lengthwise again as before. In the end you should have a strip of fabric with the side edges folded inward. Edge stitch the strap along these folds to complete it.
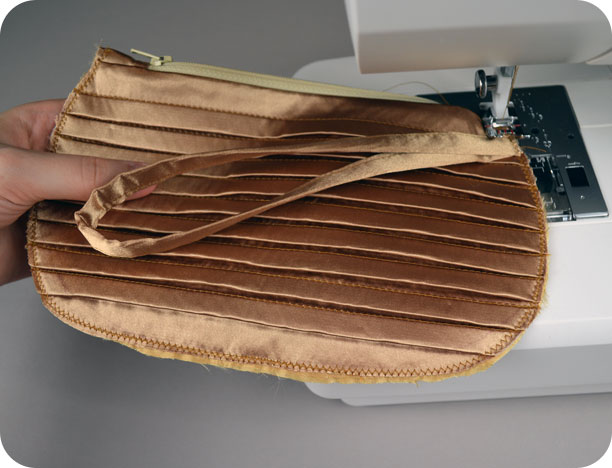
8. Fold the strap in half and baste it in place along the front of the clutch where the pattern guidelines indicate.
A typical pattern such as this would usually have you sew the lining and outer case fabrics separately to finish off the project. I chose to try something different to go along with the flimsy lining fabric I was using. Feel free to try it out to see if the process is for you. If you want to finish the pattern the typical way, steps 10 & 11 of The Zip Top Purse will cover it nicely 😀
Layer all the case fabrics together with lining fabrics facing inward and outer fabrics facing outward – everything should be arranged as if the case were finished. Pin the edges together as precisely as you can, then sew the layers together with a medium width zigzag; a seam allowance at about 1/8”. Go around the perimeter of the case, then clip any excess fabric along the sides, bottom, and corners when you finish.
9. To complete the French seam, turn the whole case right side out and press it flat. The goal here is to sew a scant 3/8” seam that will encase your previous seam allowance, so it can be a bit tricky to make sure that seam is completely covered. Once you’re sure you have it, sew along the perimeter of the case as before, and that finishes your pouch!
I can’t wait to try out more ways to use this satin 😀 I actually have quite a bit of different Chinese brocades, so stay tuned for that!
I hope you’ll give this project a try, but if you’d just like to buy the one in the photos, you can find it on my Etsy.
If you do try making the project, I’d love to see it! And I’ll send you exclusive free patterns as a reward!
For questions and terms of use information, please see the FAQ.
4 thoughts on “Freebie Friday! The Pleated Clutch”
Thank you for this awesome tutorial! So many bag patterns are OK, but not “just right” for a special occasion. This one, I feel, is perfect and I love that it can be personalized with different fabrics for different purposes. It’s just the right size, too. Thanks!
Thank you so much for your kind words! I’ve run into the same problem too with bags not seeming quite right for a special occasion. I hope this pattern works out well for whatever needs you run into! 😀
What a cute pouch! I have a ton of satin lying around, I’ll have to try this once my sewing machine is fixed. 🙂
Reblogged this on Lisa's Buzz and commented:
As I’m bouncing around cyberspace looking for some place interesting to land, I stumbled upon this blog post by Choly Knight. First, I really appreciated the great photography showing the steps. Getting clear pictures is a challenge for me, so I appreciate when I find well executed photography. I also love the french seam finish – such a great clean finish without having to do all this twisting and turning with fussy fabric like satin. Can’t wait to make this Pleated Clutch but thought I would share it with you first 🙂 Oh yes – I’m thinking embroidery is a must for this!