

Mwahaha! More old-school video game motifs are back 😀 This time it’s the energy tank from the Megaman series ^-^ I thought it would look perfect to wrap around your favorite cup of coffee since that’s what energizes most of us in the morning. I have a lot of fun memories of awesome memories of watching and playing Megaman >w< It was super simple to put together, and I was able to deplete some of my quilting cotton stash with it. I hope you’ll give it a try too to keep your favorite cup of joe warm!

Difficulty:
![]()
Super simple! It’s just the appliqué that might be a bit tricky for newbies 😀
Makes one sleeve that fits a 3 1/2” wide to 4” wide cup
Materials & Tools:
• 1/4 yd. or a 15” x 15” scrap of turquoise light to medium weight fabric (linen or broadcloth would be perfect – I used quilting cotton)
• 2 1/2” – 5” of Velcro
• Matching sewing thread
• Basic sewing tools (sewing machine, scissors, iron, needles, pins, fabric marker, seam ripper)
Appliqué supplies:
• 5” x 14” scrap of black appliqué fabric
• 5” x 5” scrap of light blue appliqué fabric
• 8” x 14” scrap of light or heavyweight fusible web
Before you begin:
1. Print out the project pattern here
2. Assemble the pattern pieces, see the page here for more help
3. Lay out the pattern pieces on your fabric and cut them out
4. Mark the fabric pieces with the markings from the pattern
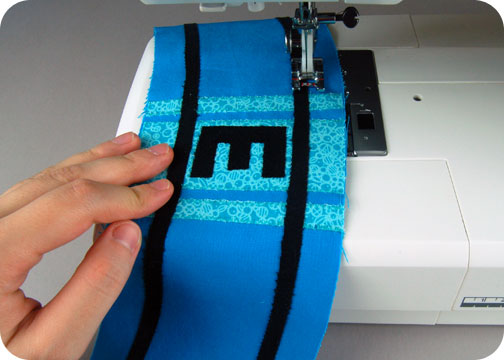
1. The majority of this project is the appliqué of course :3 So after you apply your fusible web and cut your fabric pieces, lay them out on your sleeve according to the pattern guidelines, the light blue pieces first, then the black pieces. Iron them on, and, if you used lightweight fusible web, sew them on with a straight stitch or (as I’ve done) a zigzag stitch. If you used heavyweight fusible web you can skip the sewing ^-^ The adhesive on heavyweight fusible web is meant to be enough to hold your pieces in place.
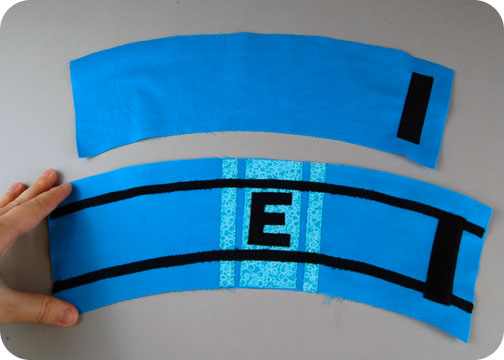
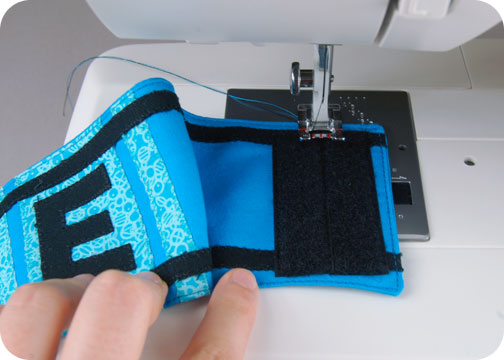
2. Now you’ll want to attach your Velcro. Sew the Velcro in place according to the pattern guidelines, putting the loop side on the sleeve front (with the appliqué), and the hook side on the inner part of the sleeve. When both viewed from the right side they should look like this.
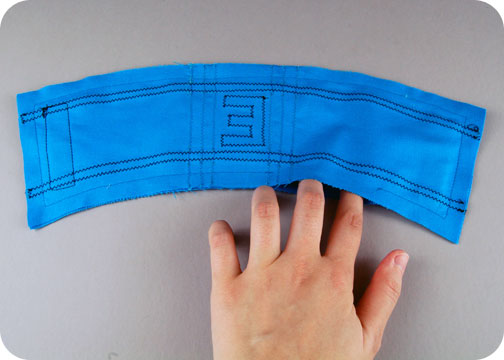
3. After the Velcro is attached you’ll need to sew the outside and inside together. Layer them with right sides facing and sew around the perimeter of the shape, leaving an opening in the bottom as the pattern guideline indicates. Trim the seam allowances (especially the corners), turn the sleeve right side out, and press the edges flat.
4. With the edges looking crisp, you’ll want to go back and edge stitch around the perimeter of the sleeve, closing up the opening you had before in the process.
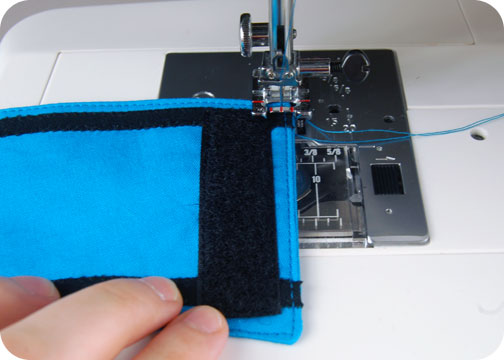
5. If you want to make the sleeve adjustable so it fits more sizes of cups, you could also add another strip of Velcro as I did. Just add another strip from the loop side beside the previous one. Now go slap it on your favorite cup because YOU’RE DONE!
So what do you think? It’s so nerdy, but I think it really brightens up a boring cup of coffee 😀
If you do try making the project, I’d love to see it! And I’ll send you exclusive free patterns as a reward!
For questions and terms of use information, please see the FAQ.