
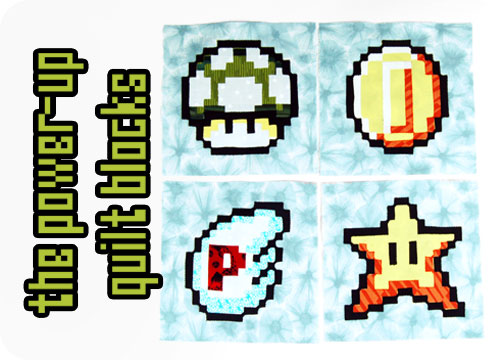
The pixel art is back! If you all remember the Heart Piece Pillow Cover, you’ll remember my love of all things 8-bit >w< I’ve been itching to make something pixely again so I gave it another go! With some leftover light blue fabric I thought maybe I could get some quilt-block sized squares to resemble the items panel from Super Mario Brothers 3. Granted of course the items in that panel didn’t include a 1-up and a coin x3 but I had to make the items that my fabric stash would allow.
The pixels would have been far too small to make the blocks pieced, so I assembled the icons with appliqué instead 😀 I think it was a bit quicker than piecing all the little squares together, but I wouldn’t say one method is better than another 🙂 For large pixels I think squares are still a fun way to go. Maybe I’ll revisit these blocks later and make more ^-^ enough for a full quilt!
Difficulty:
![]()
There actually isn’t much sewing involved in this aside from the appliqué, so if you can do that you’re set!
Makes four quilt blocks that are 8” wide x 8” tall each in finished size.
Materials & Tools:
• fat quarter of light blue (background) cotton
• fat quarter of black cotton
• fat quarter of yellow cotton
• fat quarter of gold cotton (or orange as I’ve used)
• fat quarter of white cotton
• fat quarter of aqua cotton
• fat quarter of dark green cotton
• fat quarter of green cotton
• fat quarter of red cotton
• Basic sewing tools (sewing machine, scissors, iron, needles, pins, fabric marker, seam ripper)
• 2/3 yd. of 22” wide lightweight fusible web
Before you begin:
1. Print out the project pattern here
2. Assemble the pattern pieces, see the page here for more help
3. Lay out the pattern pieces on your fabric and cut them out
4. Mark the fabric pieces with the markings from the pattern
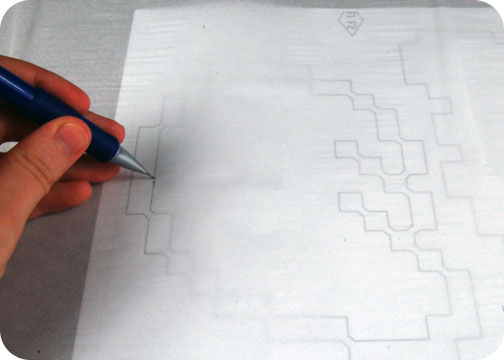
1. There are many ways to go about doing the appliqué for the quilt blocks, but since there isn’t much to these blocks besides the appliqué, I thought I would show you my method for putting it all together. Once you have your pattern printed out, you’ll want to lay your fusible web over the lines (adhesive side facing down), and trace them with a pencil onto the paper side. Note that because the appliqué is put together this way, the patterns on the paper are reversed. To make it easy on yourself, you’ll want to group together pieces of similar colors.
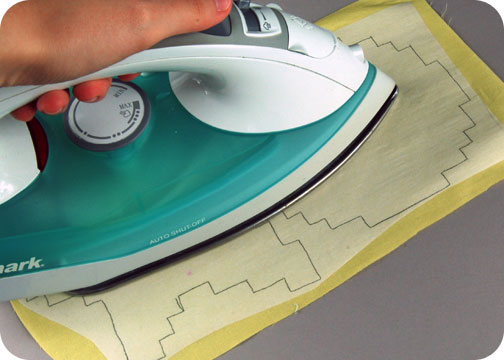
2. Now cut generally around those pieces you’ve traced and iron them to the backside of your designated fabrics. This way you can save all the persnickety cutting for when the fusible web is fully adhered to your fabric. Meanwhile, you’ll want to cut four 8 1/2” x 8 1/2” squares from your background fabric for the quilt block foundations.
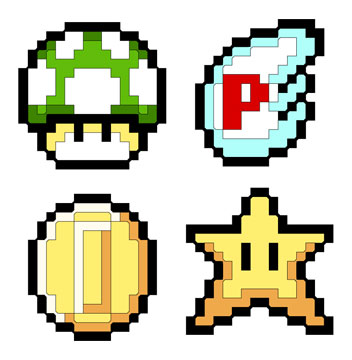
3. Cut out all of your fused fabric pieces, peel off the fusible web paper backing, and arrange them onto your background fabric according to the finished image. The layers should go something like this:
Mushroom: green, dark green, white, yellow, black
P-Wing: white, aqua, red, black
Coin: yellow, orange/gold, white, black
Star: yellow, orange/gold, black
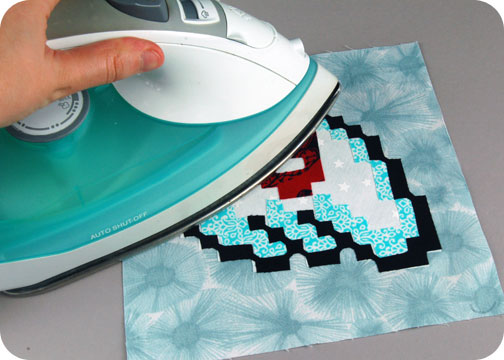
4. With your image all assembled, you’re now free to iron it in place. It helps if you press the layers without moving the iron back and forth too much. Just lift the iron and press it down, lift it up again, move it across, and press it down.
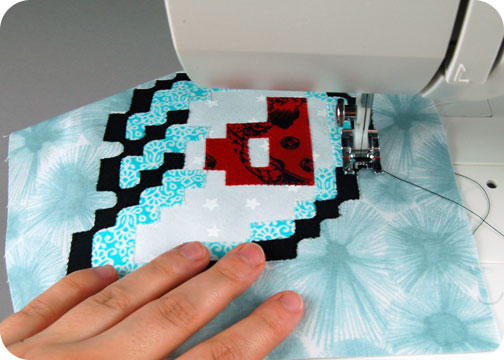
5. And lastly all that’s left is to sew your edges down! You could do a straight stitch around all the fabric shapes, a satin stitch, or (like me) a zigzag stitch. After all the layers are sewn, your quilt block is free to use in your next quilt, or maybe another project! Like a wall-hanging, tablet cover, pillow cover, you name it!
So what do you think? Are you glad to see the pixel art come back? I’m already brimming with more ideas!
If you do try making the project, I’d love to see it! And I’ll send you exclusive free patterns as a reward!
For questions and terms of use information, please see the FAQ.