

I must admit, while I really like the finished look of this tote bag, I think its purpose was more to destash little leftovers than anything else. I just started grabbing little bits of fabrics I had leftover and found that they really started to look good together! This especially goes for the store-bought wooden handles, the braided cording, and the velvet ribbon (used to attach the handles). I was able to finally get them out of my stash, but on the plus side they all match beautifully 😀
This bag itself is made out of strips of various fabrics for this awesome layered look, the top has purchased handles that are attached via velvet ribbon, and the sides cinch up with some braided cording that gives some texture to the final tote ^-^

Difficulty:
![]()
The rest of the bag is pretty easy, but the cinching up the sides might be a little tricky for newbies
Makes one tote that is 11” wide, 12” tall, and about 4” deep
Materials & Tools:
• ⅛ yd. of medium to heavyweight fabric for tier A (canvas or twill would be perfect – I used faux suede)
• ¼ yd. of medium to heavyweight fabric for tier B (canvas or twill would be perfect – I used heavy linen)
• ¼ yd. of medium to heavyweight fabric for tier C (canvas or twill would be perfect – I used faux suede)
• ⅓ yd. of medium to heavyweight fabric for tier D (canvas or twill would be perfect – I used canvas)
• ⅛ yd. of lightweight fabric for tier A lining (I used quilting cotton)
• ¼ yd. of lightweight fabric for tier B lining (I used quilting cotton)
• ¼ yd. of lightweight fabric for tier C lining (I used quilting cotton)
• ⅓ yd. of lightweight fabric for tier D lining (I used quilting cotton)
• ½ yd. of ½” – 1” wide ribbon
• 3 yds. of cording for sides – no wider than ¼”
• 6” wide pair of purchased purse handles with holes at each end
• Matching sewing thread
• Basic sewing tools (sewing machine, scissors, iron, needles, pins, fabric marker, seam ripper)
Before you begin:
1. Print out the project pattern here
2. Assemble the pattern pieces, see the page here for more help
3. Lay out the pattern pieces on your fabric and cut them out
4. Mark the fabric pieces with the markings from the pattern
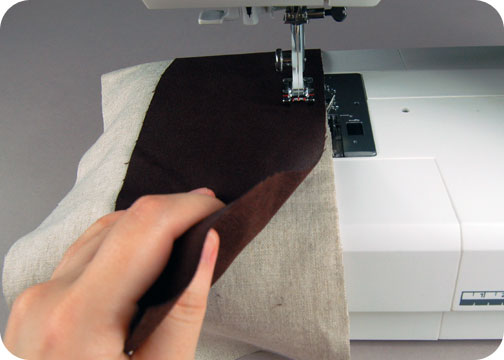
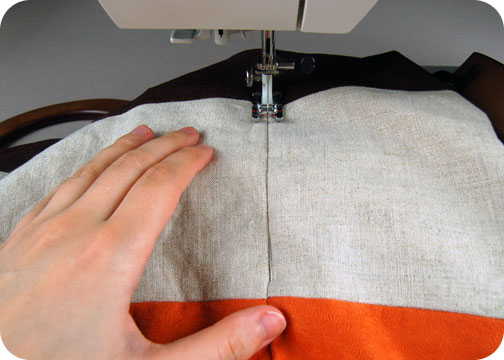
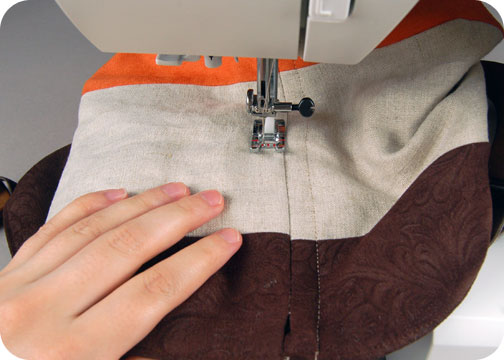
1. The first part of the bag comes together really easily 😀 We’re just going to sew all the tiers together to create the striped pattern for the finished bag. In the photo I’m sewing the bottom of tier A to the top of tier B by matching up the raw edge with the single notches and sewing along that edge. Repeat the same thing by sewing tier C to tier D, again, matching up the single notches and sewing along that edge.
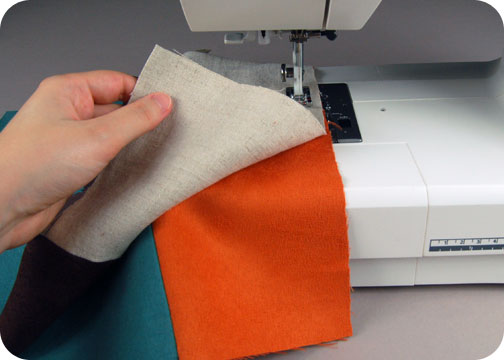
2. Then to finish the complete striped look, we’ll add the top and bottom section, sewing the bottom of tier B to the top of tier C by matching up the double notches and sewing along that edge. Repeat these steps with your remaining tier pieces for the outside of the bag so you have both a back and a front. Press the seams open so the next step will be easier.

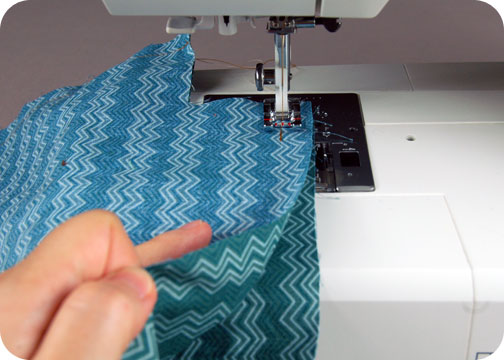
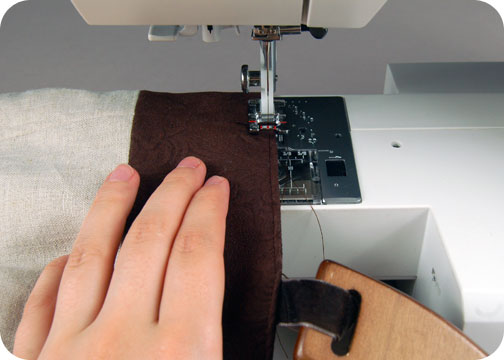
3. Now we can start to form the body of the bag. Layer your bag front and back together, matching up all the raw edges. Sew them together along the sides and bottom, leaving the top and corners free for later. Be sure to leave an opening at the top of the bag (as indicated by the pattern guidelines) as you can see in the picture. We’ll need this later for threading the cording.
4. Next we’ll need to do the same procedure with the lining pieces. Repeat steps 1 & 2 with your lining tiers. Line up your raw edges as in step 3, but don’t worry about leaving the opening at the top corners of the bag. The only opening necessary for the lining is the one at the bottom that’s indicated by the pattern for turning the bag right side out later. Otherwise, sew the side and bottom seams as usual.
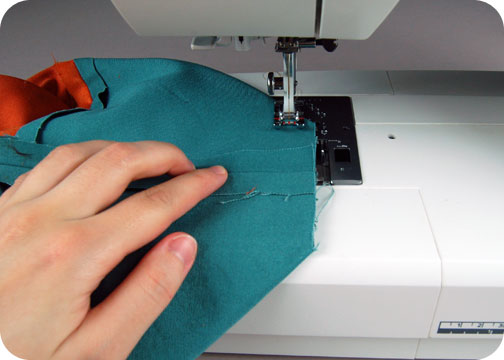
5. Moving onto those corners we skipped over later. Fold the corners of your bag at a 45˚ so your side seam and bottom seam matches up. The raw edges of your corner should line up nicely then, and you can sew along this edge. This will give some depth to your bag 😀
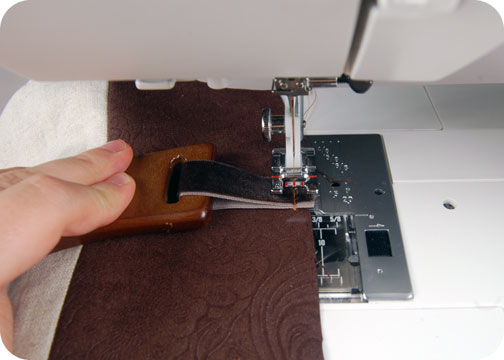
6. Now we can baste on the handles to the bag. Begin this by cutting your ribbon into four 4” lengths. Wrap one through the hole at the end of your handle, bringing the two raw edges together. Then baste those raw edges along the top edge the front side of your outer bag where the pattern guidelines indicate. Repeat this with the other end of the handle, then use the remaining handle and ribbon pieces for the back side of the bag.
7. With your handles in place, you can now sew your lining to your main bag. Nestle the main bag into the lining with right sides together and match up the raw edges along the top. Once everything is in place, sew the layers together all the way around the perimeter.
With that finished, turn the bag right side out from the opening in the lining and press the top edge nice and crisp.
8. To keep the top edge looking crisp, sew an edge stitch around the perimeter of the top edge of the bag. Be careful when going around the handles so they don’t push you off track.
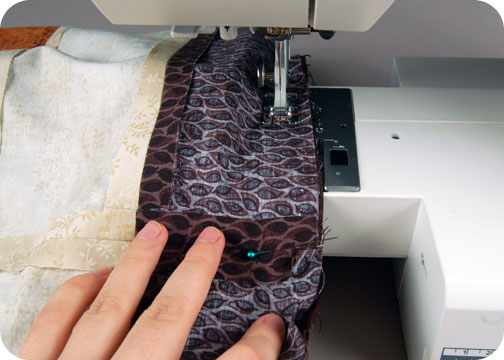
9. We’re almost done! All that’s left is to make the casing for the cording on the side. Begin by matching up the side seams of your outer bag with your lining. It’s difficult to get it exactly right, but try your best to get that seam to match up exactly with the lining beneath it, then pin it in place. Once you have it as close as you can get, sew down in the ditch of this seam until you get to the square marking located about 3” down from the top of tier D.
10. Repeat the same line of stitching ½” from the right and left side of the original seam, again going from the top of the bag all the way down to the square marking. You should now have 2 channels on the side of your bag, with a small opening (from step 3) at the top.

11. Cut your cording into four equal pieces. Attach/tie one of the pieces to a safety pin, and use it to lace the cording through the opening and down one of the channels you’ve just made. Pull the cording through the channel and pull it about ½” or so beyond the end. Then reach in through the inside of the bag from the opening in the lining, and detach the safety pin. Be sure not to pull on the cording so that it stays put where you have it in the channel. Repeat this with another bit of cording and the second channel. With both in place, you can move onto the next step.

12. Bring the bag back under the machine, and sew across the bottom of both channels. You should be able to sew through the bottom of both cords this way, anchoring them in place.
When you’ve finished that, repeat steps 9-12 with the other side of your bag. Then when that is all complete, you’ll want to go back and sew the opening in your lining closed, as you’ll no longer need to reach into it to retrieve safety pins x3 Do so either with a hand-sewn ladder stitch or a quick machine stitch.
Now all that’s left is to make some cute little bows on the side of your bag with the cording! Cinch the cording up however you like then tie it up all pretty >w<!
So what do you think? I really love the way all those random bits came together into something cute ^-^
I hope you enjoy making this project, but if you’d rather have the one from the photos, you can purchase it from my Etsy.
And if you do try making the project, I’d love to see it! And I’ll send you exclusive free patterns as a reward!
For questions and terms of use information, please see the FAQ.